Basic Information
In image-driven 3D building reconstruction, instance segmentation is fundamental to pixel-wise building component detection, which can be fused with 3D data like point clouds and meshes via camera projection for semantic reconstruction. While deep learning-based segmentation has obtained promising results, it relies heavily on large-scale datasets for training. Unfortunately, existing large-scale image datasets often include irrelevant objects that obstruct building components, making them unsuitable for 3D building reconstruction. This paper addresses this gap by introducing a large-scale building image dataset to facilitate building component segmentation for 3D reconstruction. The dataset comprises 3378 images captured from both interiors and exteriors of 36 university buildings, annotated with 49,380 object instances across 11 classes. Rigorous quality control measures were employed during data collection and annotation. Evaluation of five typical deep learning-based instance segmentation models demonstrates the dataset’s suitability for training and its value as a benchmark dataset for building component segmentation.
Below is the link to the paper:
Mun On Wong, Huaquan Ying, Mengtian Yin, Xiaoyue Yi, Lizhao Xiao, Weilun Duan, Chenchen He, Llewellyn Tang,
Semantic 3D reconstruction-oriented image dataset for building component segmentation,Automation in Construction,Volume 165,2024,105558,ISSN 0926-5805,
https://doi.org/10.1016/j.autcon.2024.105558.
https://www.sciencedirect.com/science/article/pii/S0926580524002942
My Work
I need to convert this dataset into the YOLOV8 format and then train it for architectural component segmentation. This segmentation can be used in point cloud projection to project individual components, such as walls, windows, or ceilings, where I only need specific elements like walls, windows, or ceilings.
Download Hong Kong University Architectural Dataset in YOLOV8 Format
Now, I will share how to train the dataset into a YOLOV8-supported model file.
Training Process
I used the free computational power provided by Kaggle for training, and I trained for a total of 330 epochs.
Install YOLOv8
INPUT:
%pip install ultralyticsimport ultralyticsultralytics.checks()OUTPUT:
Ultralytics YOLOv8.2.82 🚀 Python-3.10.13 torch-2.1.2 CUDA:0 (Tesla T4, 15095MiB)Setup complete ✅ (4 CPUs, 31.4 GB RAM, 5845.9/8062.4 GB disk)Test YOLOv8
Now we need to test whether YOLOv8 is installed successfully. We will test it with an official image.
INPUT:
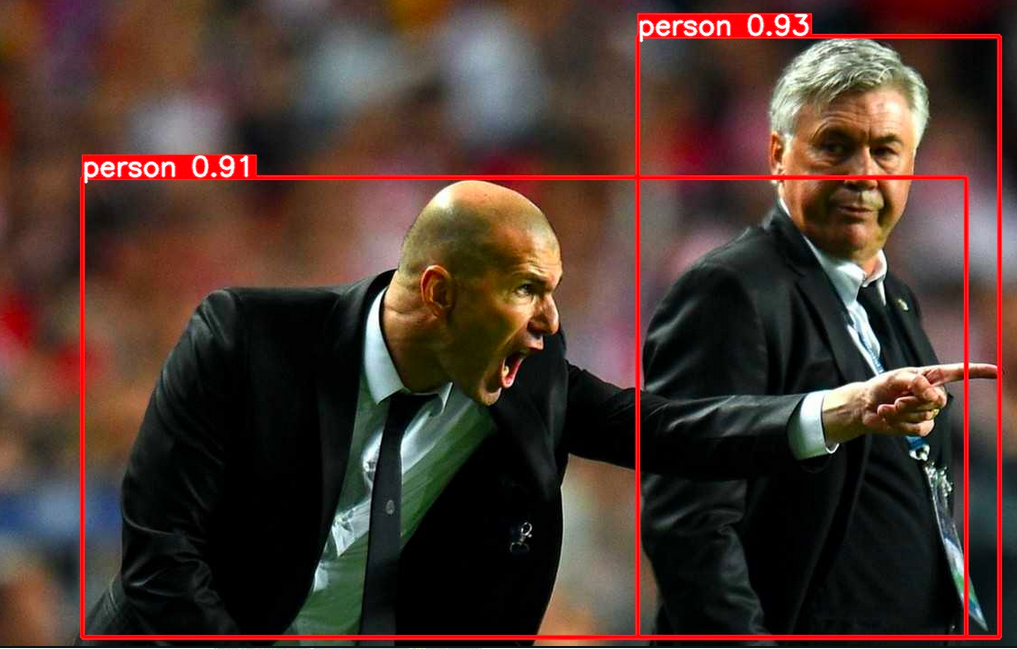
# Run inference on an image with YOLOv8n!yolo predict model=yolov8n.pt source='https://ultralytics.com/images/zidane.jpg'If the installation is successful, you will find the following image in the runs/detect/predict folder. At this point, you can start using YOLOv8.
Begin Training
You can start training the dataset using the following program:
!yolo segment train data=/kaggle/input/buliding/data.yaml model=yolov8n-seg.pt epochs=330 imgsz=640 device=[0,1] save_period=50The content of data.yaml is as follows:
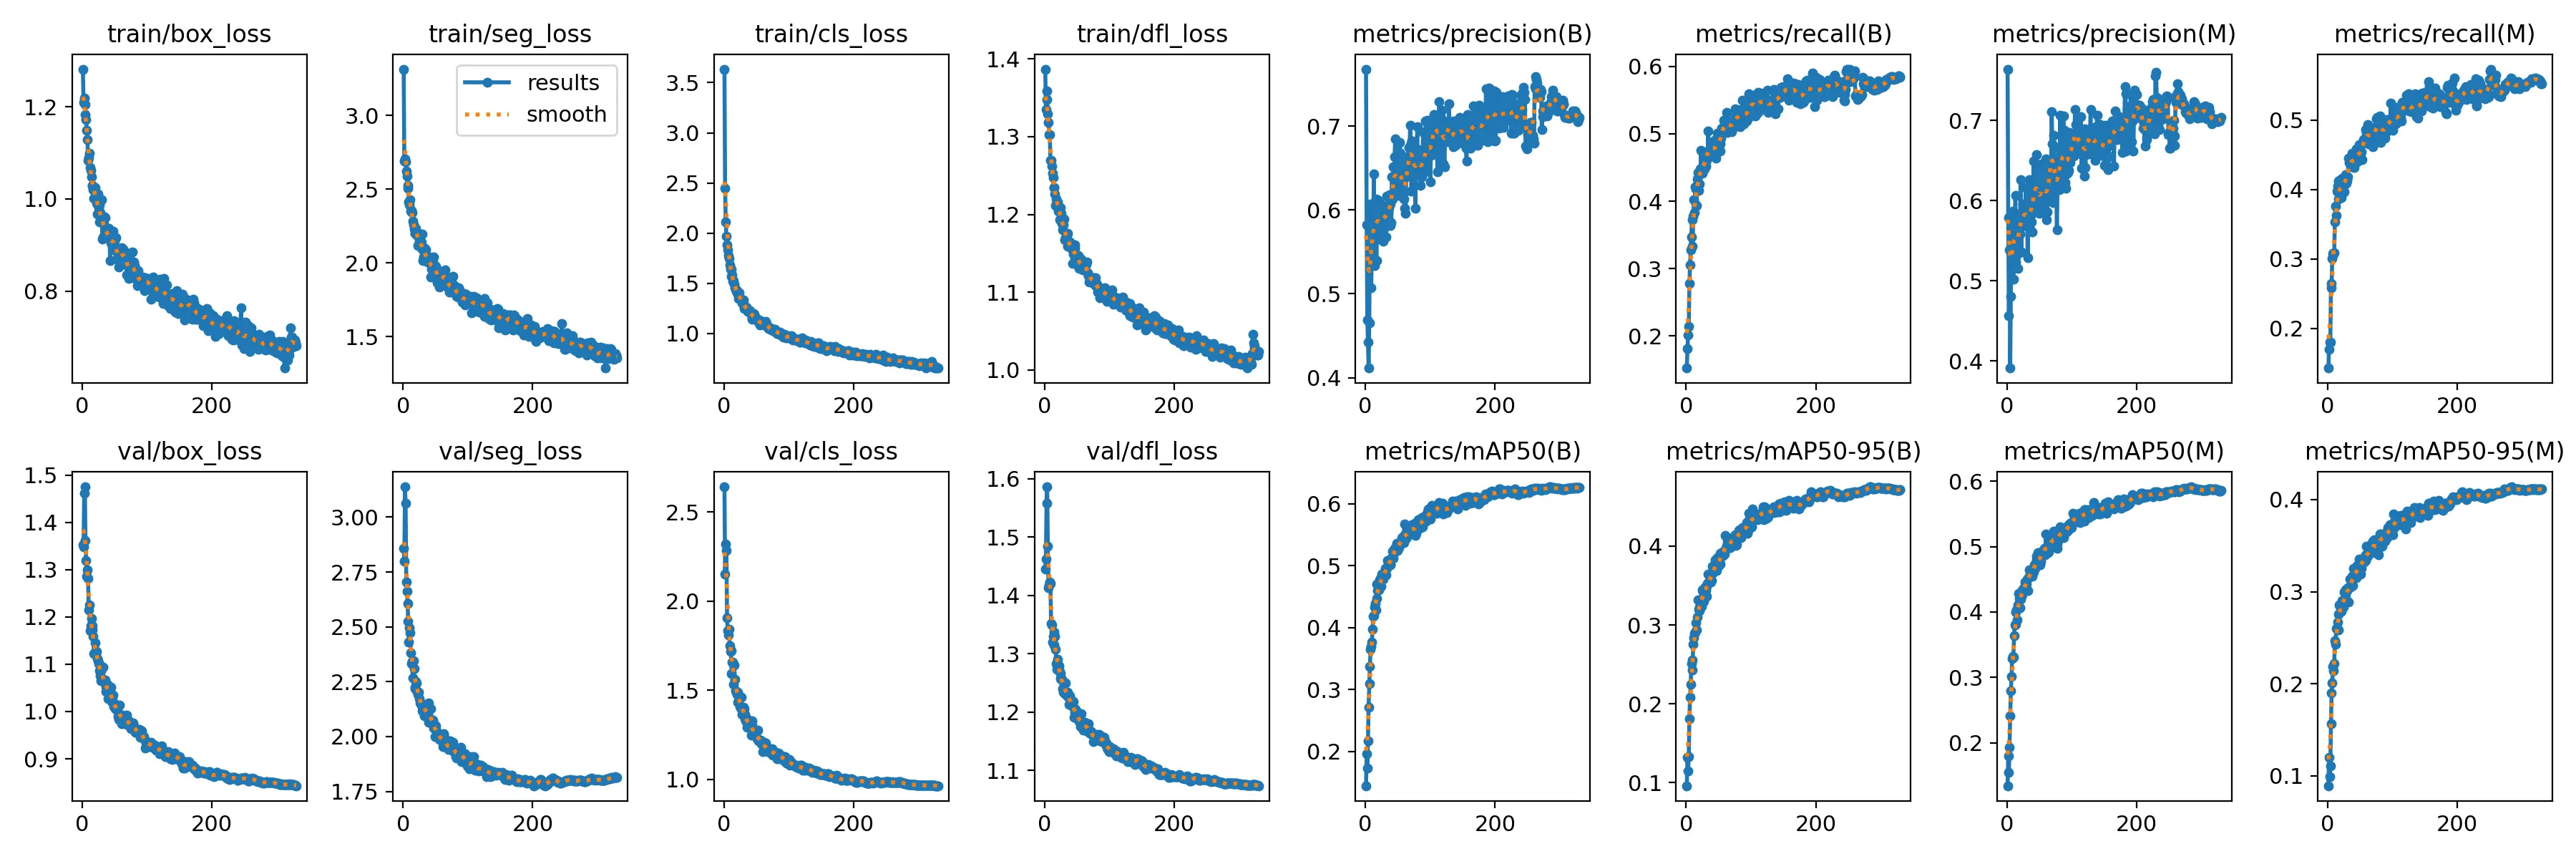
train: /kaggle/input/buliding/train/images val: /kaggle/input/buliding/valid/images test: /kaggle/input/buliding/test/images nc: 12 names: ['Beam', 'Ceiling', 'Column', 'CurtainWall', 'Door', 'Floor', 'Lift', 'Opening', 'Roof', 'Wall', 'Window', 'object']If the training is successful, you will be able to see the training curves in the results.
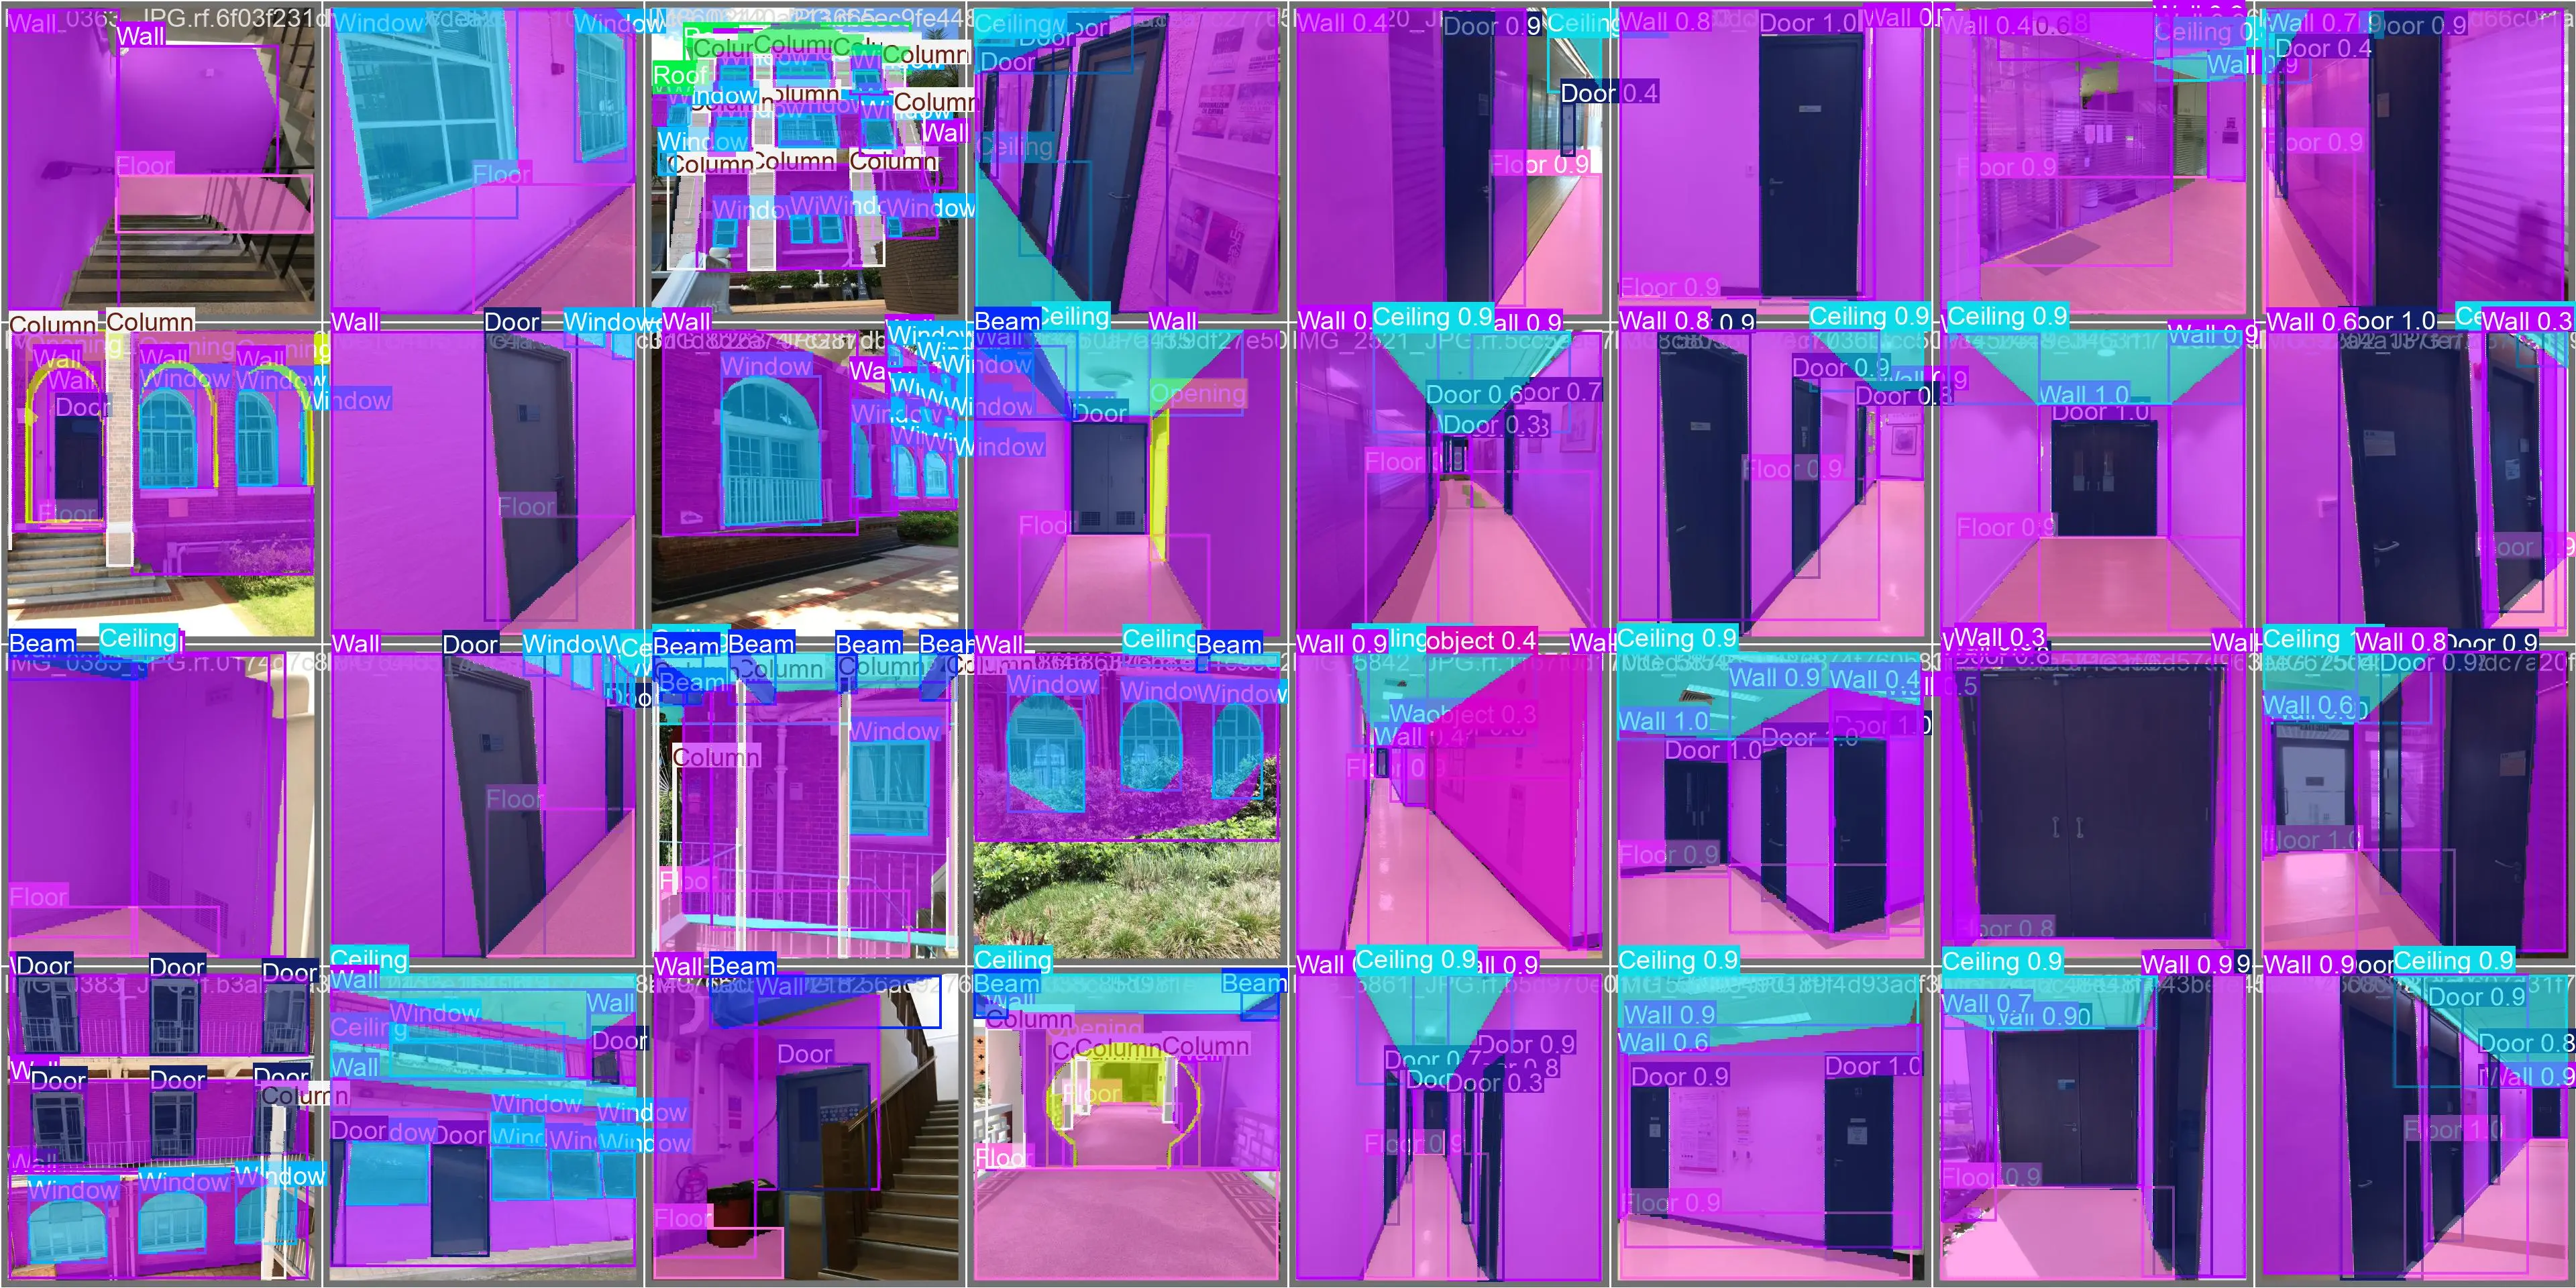
Below are some details about the scope and labels of architectural components:
Test
Let’s write a piece of code to test the segmentation effect:
from ultralytics import YOLOimport cv2import numpy as np
# Define a set of conspicuous colorscolors = [    (0, 255, 0),    # Green    (0, 0, 255),    # Red    (255, 0, 0),    # Blue    (255, 255, 0),  # Yellow    (255, 0, 255),  # Magenta    (0, 255, 255),  # Cyan    (128, 0, 128),  # Purple    (255, 165, 0),  # Orange    (0, 128, 128),  # Teal    (128, 128, 0)   # Olive]
model = YOLO('/runs/best.pt')  # Use instance segmentation model
# Read the imageimage_path = '/Users/0081.png'image = cv2.imread(image_path)
# Perform predictionresults = model(image)
# Process resultsfor i, result in enumerate(results):    masks = result.masks.data  # Masks    boxes = result.boxes.xyxy  # Bounding boxes    classes = result.boxes.cls  # Classes    scores = result.boxes.conf  # Confidence scores
    # Output results    for j, (box, mask, cls, score) in enumerate(zip(boxes, masks, classes, scores)):        x1, y1, x2, y2 = map(int, box)        class_id = int(cls)        confidence = float(score)
        # Output bounding box and class information        print(f"Bounding Box: ({x1}, {y1}), ({x2}, {y2})")        print(f"Class: {class_id}, Confidence: {confidence:.2f}")
        # Convert mask to 8-bit image        mask = mask.cpu().numpy()        mask = (mask * 255).astype(np.uint8)
        # Resize mask to match the image shape        mask = cv2.resize(mask, (image.shape[1], image.shape[0]))
        # Select a conspicuous color        color = colors[j % len(colors)]
        # Convert mask to colored mask        colored_mask = np.zeros_like(image)        colored_mask[mask > 0] = color
        # Overlay colored mask onto the original image        image = cv2.addWeighted(image, 1, colored_mask, 0.5, 0)
        # Draw bounding box and class label on the image        cv2.rectangle(image, (x1, y1), (x2, y2), color, 2)        cv2.putText(image, f'Class {class_id}', (x1, y1 - 10), cv2.FONT_HERSHEY_SIMPLEX, 0.9, color, 2)
# Display the result imagecv2.imshow('Segmented Image', image)cv2.waitKey(0)cv2.destroyAllWindows()
The output of this code:
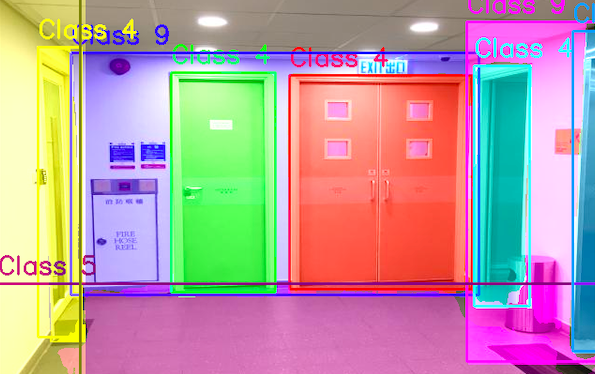
Great,👌 we have obtained a very good result.
Summary
By training the dataset, we obtained a fairly good result for architectural component segmentation, which plays a significant role in subsequent 3D reconstruction and point cloud modeling. Accurate segmentation of architectural components also makes subsequent work much smoother.
Enjoy your usage!