Introduction
In the realm of photography, especially in astrophotography and long-exposure scenarios, image stacking is a technique that combines multiple images to create a single, high-quality image. This process helps in reducing noise and enhancing details. While there are several professional tools available for image stacking, many photographers, especially beginners, seek a simpler, more user-friendly solution.

Enter Simple Stack – a foolproof stacking software designed specifically for MAC users. Simple Stack aims to simplify the image stacking process, making it accessible to both novice and experienced photographers alike. With an intuitive interface and straightforward functionality, Simple Stack eliminates the complexities often associated with image processing software, allowing users to focus on capturing stunning images rather than wrestling with technical details.
Interface Introduction
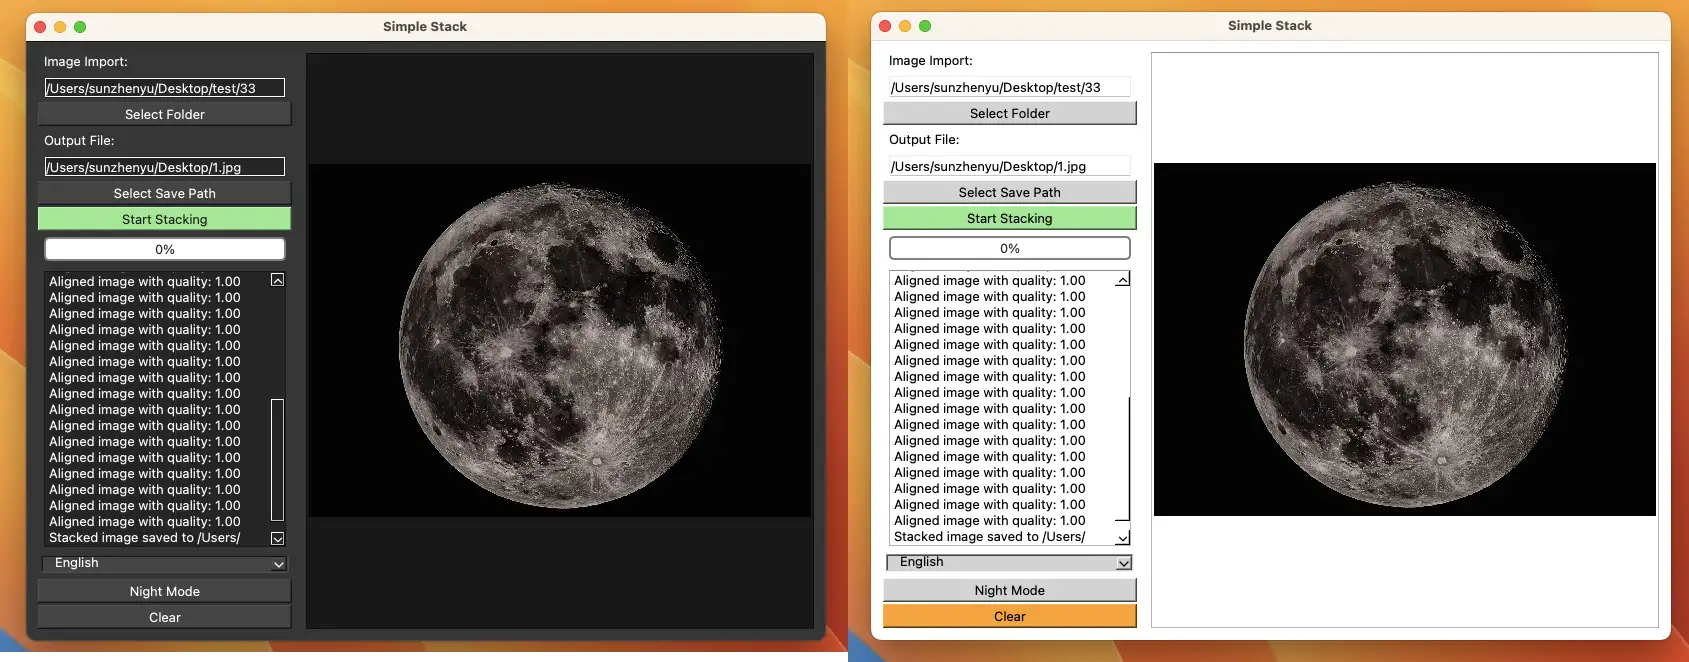
- Support for Dark Mode.
- Bilingual Support.
- Simplicity and Ease of Use.
How It Works
In the fields of photography and computer vision, image stacking is a powerful technique that combines multiple images into a single high-quality image. This method is commonly used in astrophotography, macro photography, and scenarios requiring long exposures to reduce noise and enhance details. This Section will delve into a Python and OpenCV-based image stacking and enhancement program, explaining its workings in detail.
Program Overview
The main function of this program is to align, stack, and enhance multiple images from a specified folder, ultimately generating a high-quality image. The program flow is as follows:
- Load Images: Load all images from the specified folder.
- Image Alignment: Align images using ORB feature detection and the RANSAC algorithm.
- Image Stacking: Stack the aligned images using weighted average stacking.
- Image Enhancement: Enhance the stacked image using wavelet transform denoising, unsharp masking, and CLAHE for contrast enhancement.
- Save and Display Results: Save and display the final stacked image.
Code Explanation
1. Load Images
def load_images_from_folder(folder): images = [] for filename in os.listdir(folder): img = cv2.imread(os.path.join(folder, filename)) if img is not None: images.append(img) return imagesThe load_images_from_folder function is responsible for loading all images from the specified folder. It iterates through each file in the folder, reads the image using cv2.imread, and appends successfully read images to the images list.
2. Image Alignment
def align_images(base_image, image_to_align):    orb = cv2.ORB_create()    keypoints1, descriptors1 = orb.detectAndCompute(base_image, None)    keypoints2, descriptors2 = orb.detectAndCompute(image_to_align, None)
    bf = cv2.BFMatcher(cv2.NORM_HAMMING, crossCheck=True)    matches = bf.match(descriptors1, descriptors2)    matches = sorted(matches, key=lambda x: x.distance)    good_matches = matches[:int(len(matches) * 0.15)]
    if len(good_matches) < 4:        return None, 0
    src_pts = np.float32([keypoints1[m.queryIdx].pt for m in good_matches]).reshape(-1, 1, 2)    dst_pts = np.float32([keypoints2[m.trainIdx].pt for m in good_matches]).reshape(-1, 1, 2)
    M, mask = cv2.findHomography(dst_pts, src_pts, cv2.RANSAC, 5.0)    alignment_quality = np.sum(mask) / len(mask)
    aligned_image = cv2.warpPerspective(image_to_align, M, (base_image.shape[1], base_image.shape[0]))
    return aligned_image, alignment_quality
The align_images function aligns two images. It first uses the ORB feature detector to detect keypoints and descriptors of both images, then uses BFMatcher for feature matching. To improve alignment accuracy, the program retains only the top 15% of matches. Subsequently, the RANSAC algorithm is used to estimate the homography matrix, and the image is transformed using cv2.warpPerspective to achieve alignment.
3. Image Stacking
def stack_images_weighted_average(images):    stacked_image = images[0].astype(np.float32)    weights = np.ones_like(stacked_image)
    for image in images[1:]:        stacked_image += image.astype(np.float32)        weights += np.ones_like(image)
    stacked_image /= weights    stacked_image = np.clip(stacked_image, 0, 255).astype(np.uint8)
    return stacked_image
The stack_images_weighted_average function stacks the aligned images using weighted average stacking. It initializes the stacked image with the first image, then iterates through the remaining images, accumulating them into the stacked image and calculating their weights. Finally, it computes the weighted average and converts the result back to uint8 format.
4. Image Enhancement
def enhance_image(image):    if image.dtype != np.uint8:        image = np.clip(image, 0, 255).astype(np.uint8)
    coeffs = pywt.dwt2(image, 'db1')    cA, (cH, cV, cD) = coeffs    cA = pywt.threshold(cA, np.std(cA), mode='soft')    cH = pywt.threshold(cH, np.std(cH), mode='soft')    cV = pywt.threshold(cV, np.std(cV), mode='soft')    cD = pywt.threshold(cD, np.std(cD), mode='soft')    denoised_image = pywt.idwt2((cA, (cH, cV, cD)), 'db1')
    if denoised_image.dtype != np.uint8:        denoised_image = np.clip(denoised_image, 0, 255).astype(np.uint8)
    blurred = cv2.GaussianBlur(denoised_image, (0, 0), 3)    unsharp_mask = cv2.addWeighted(denoised_image, 1.5, blurred, -0.5, 0)
    if unsharp_mask.dtype != np.uint8:        unsharp_mask = np.clip(unsharp_mask, 0, 255).astype(np.uint8)
    lab = cv2.cvtColor(unsharp_mask, cv2.COLOR_BGR2LAB)    l, a, b = cv2.split(lab)    clahe = cv2.createCLAHE(clipLimit=2.0, tileGridSize=(8, 8))    l = clahe.apply(l)    lab = cv2.merge((l, a, b))    enhanced_image = cv2.cvtColor(lab, cv2.COLOR_LAB2BGR)
    return enhanced_image
The enhance_image function enhances the stacked image. It first denoises the image using wavelet transform, then enhances edges using unsharp masking, and finally enhances contrast using CLAHE (Contrast Limited Adaptive Histogram Equalization).
5. Main Function
def main():    folder = "/Users/img"    images = load_images_from_folder(folder)
    if len(images) == 0:        print("No images found in the folder.")        return
    base_image = images[0]    aligned_images = [base_image]
    for image in tqdm(images[1:], desc="Aligning images"):        aligned_image, alignment_quality = align_images(base_image, image)        if alignment_quality > 0.5:            aligned_images.append(aligned_image)
    stacked_image = stack_images_weighted_average(aligned_images)    enhanced_image = enhance_image(stacked_image)
    cv2.imwrite("stacked_image.jpg", enhanced_image)    cv2.imshow("Stacked Image", enhanced_image)    cv2.waitKey(0)    cv2.destroyAllWindows()
if __name__ == "__main__":    main()
The main function is the entry point of the program. It first loads the images, then selects the first image as the base image and aligns the remaining images. Next, it stacks and enhances the aligned images, and finally saves and displays the result.
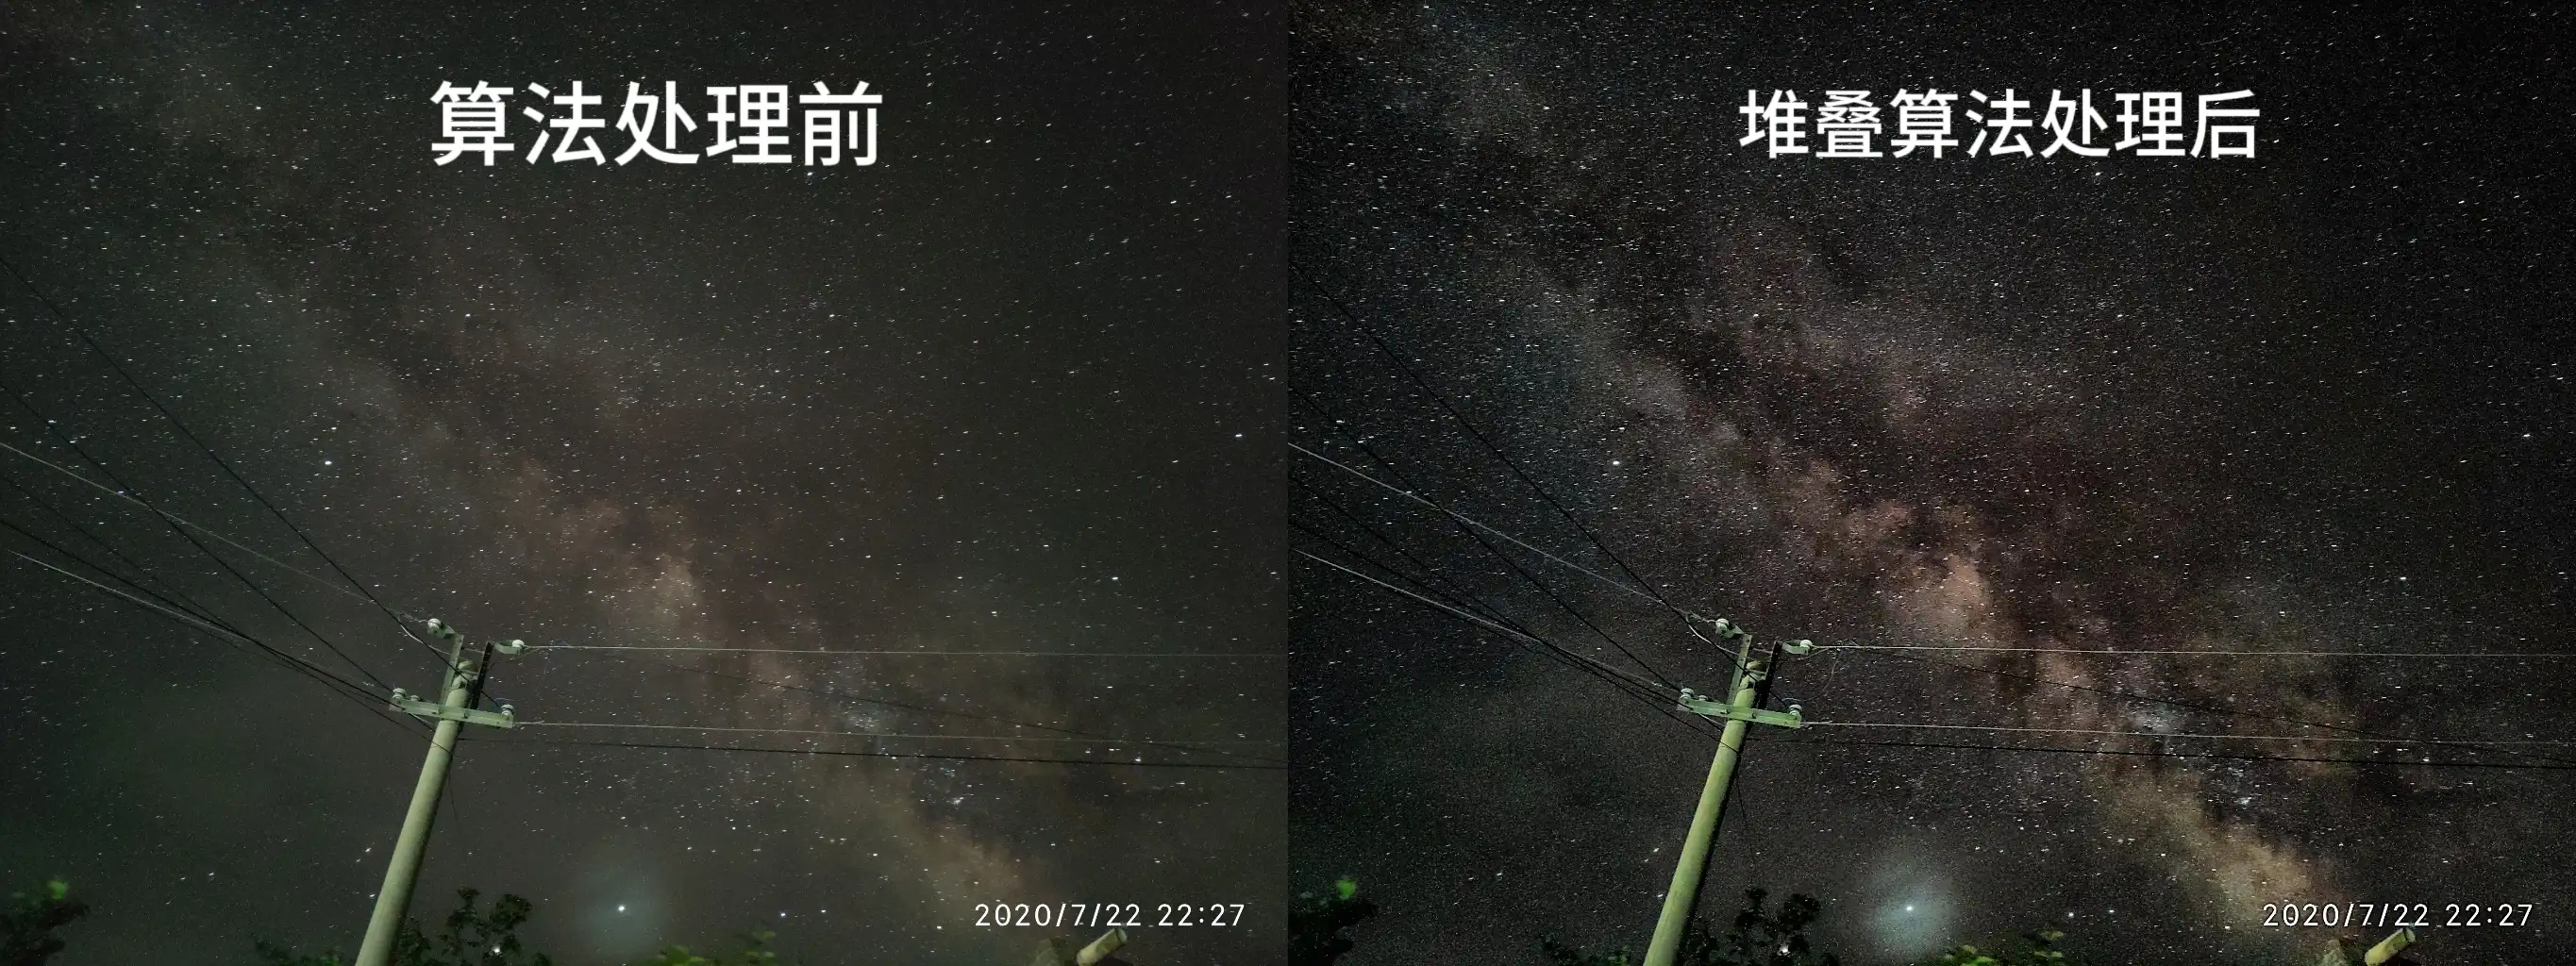
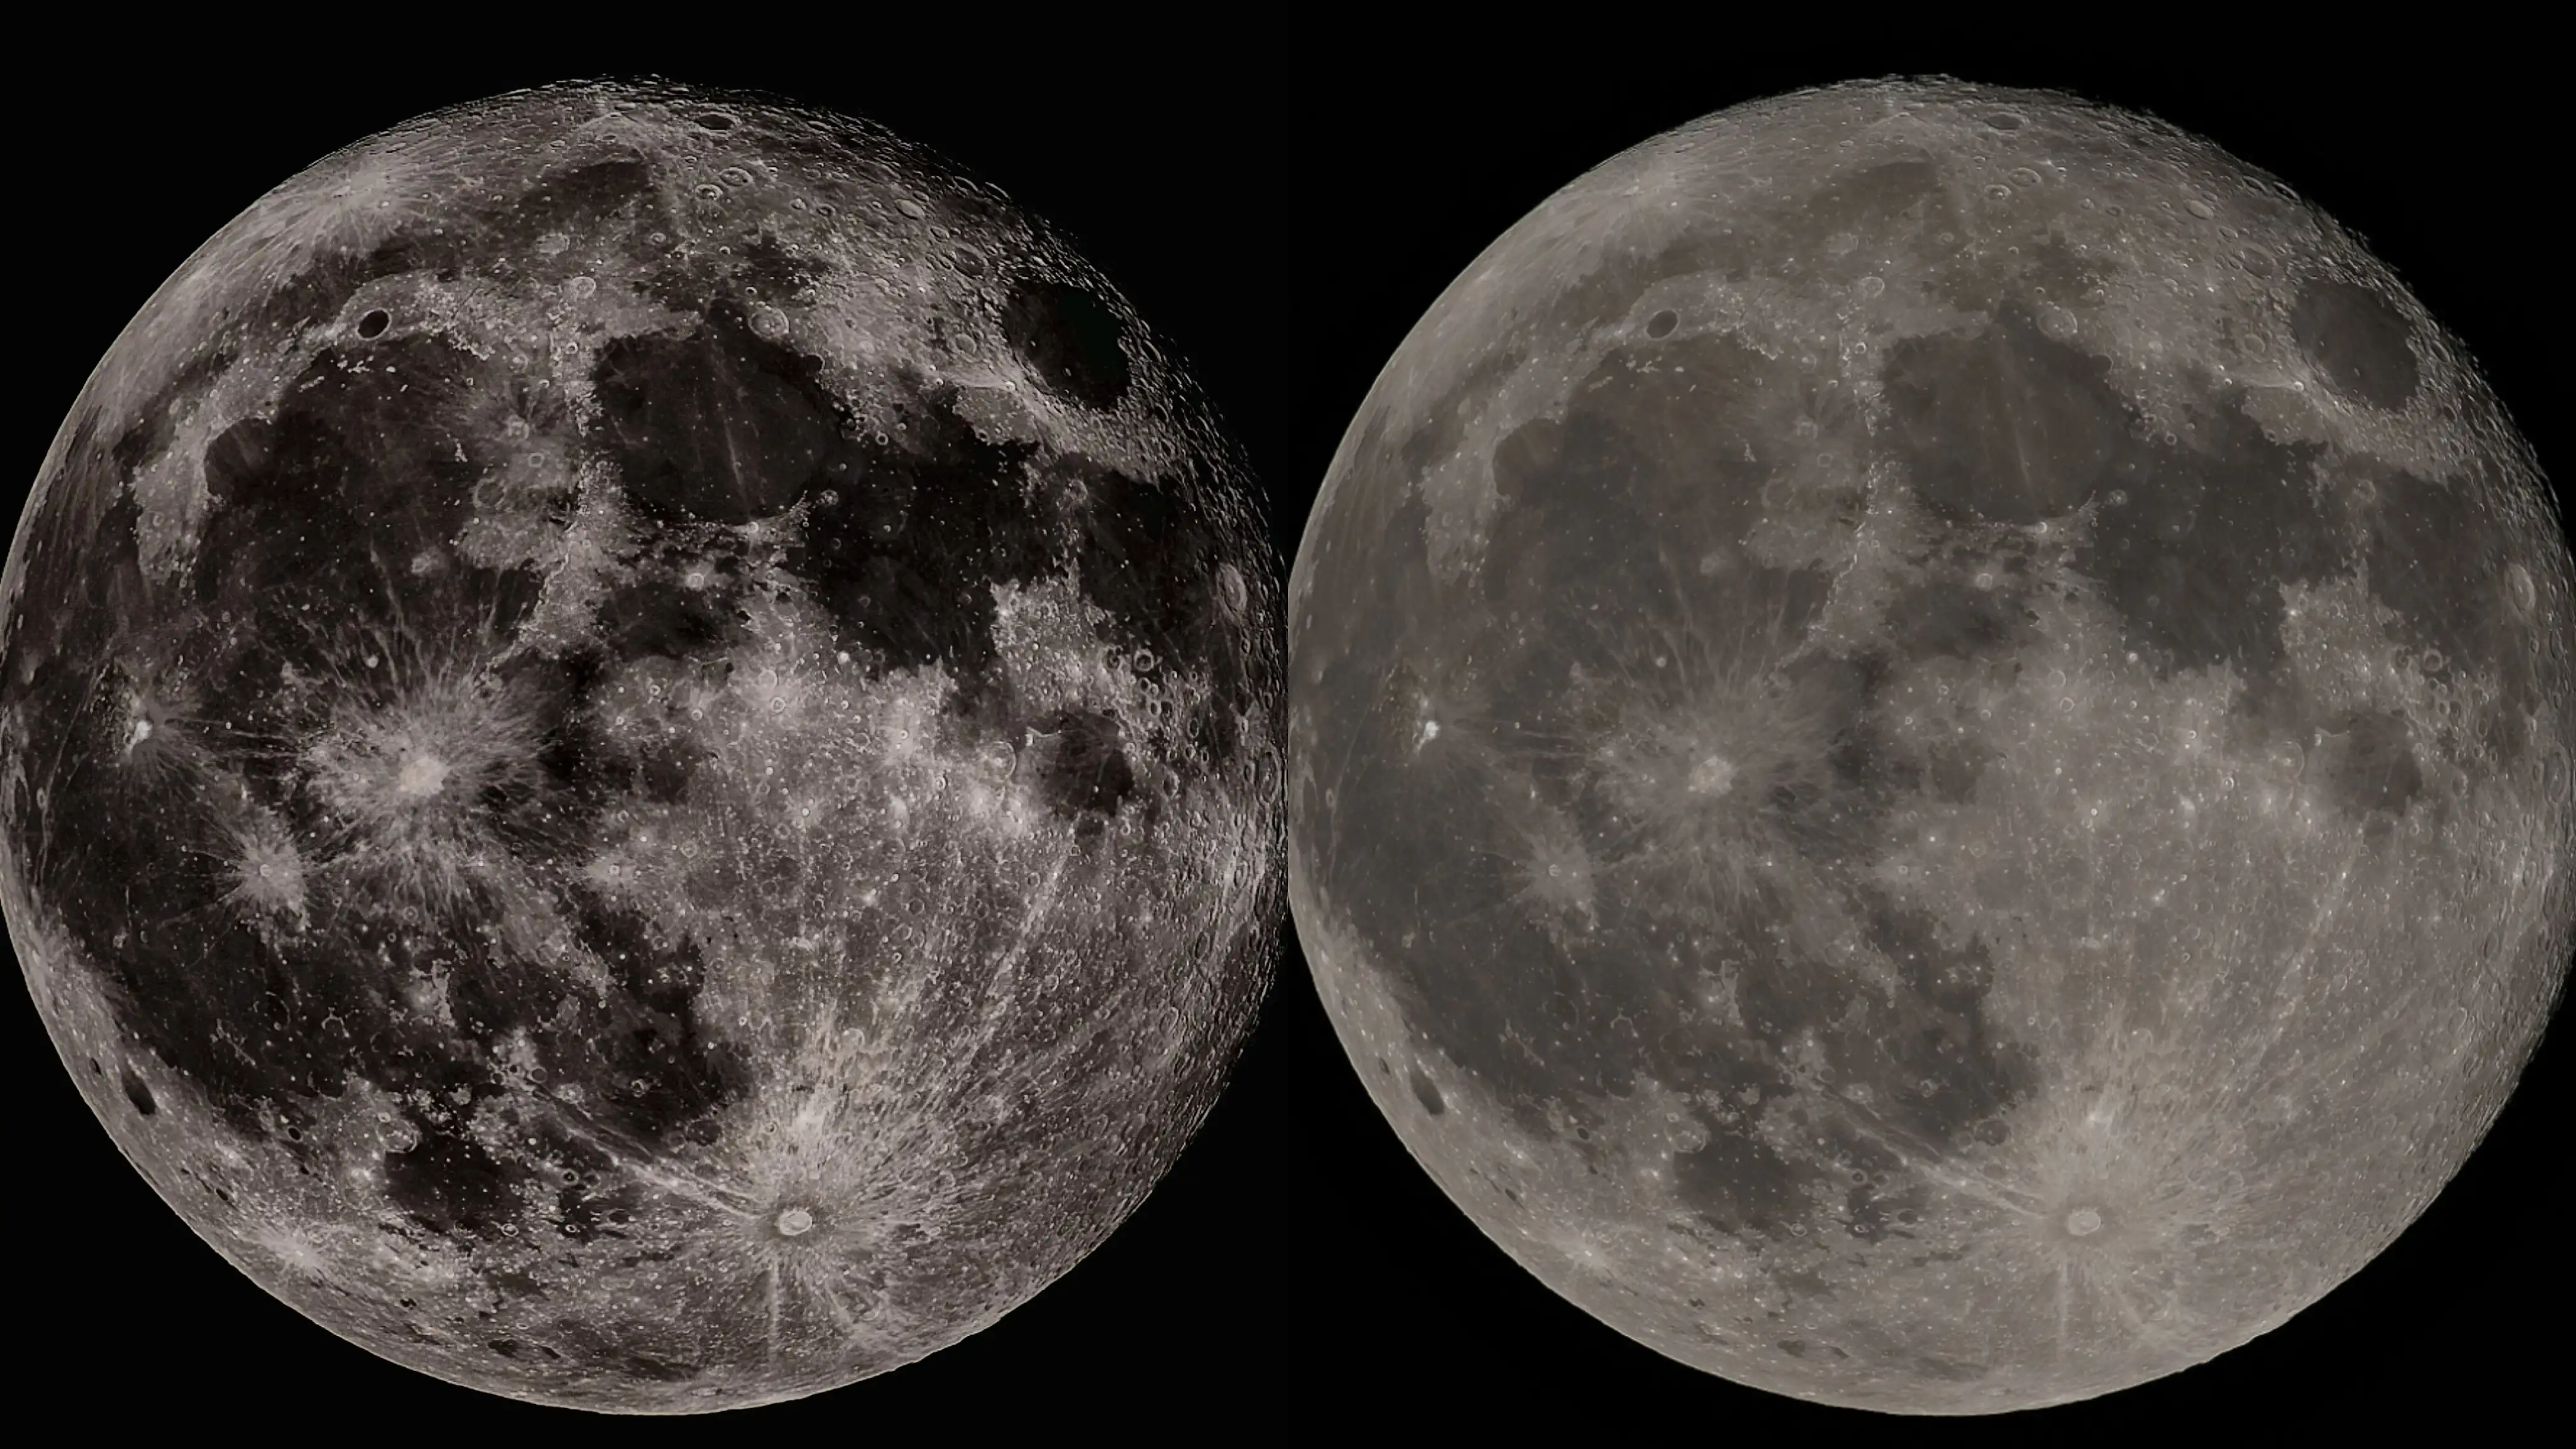
Effect Demonstration
We tested many photos and achieved good results.
Processing of Starry Skies
Moon Processing
Conclusion
Simple Stack represents a significant step forward in making image stacking accessible to a broader audience. By focusing on simplicity, user-friendliness, and powerful functionality, Simple Stack empowers photographers to create high-quality images with ease. Whether you are a beginner or an experienced photographer, Simple Stack offers a seamless and efficient solution for your image stacking needs.
We invite you to try Simple Stack and experience the difference it can make in your photography workflow. Download it today and start creating stunning images with minimal effort!
Download
You can download it from the following link, and it can be used directly after extraction.
https://huggingface.co/datasets/ColamanAI/3DPointCloud/resolve/main/SimpleStack.zip